My First MkDocs
Angular / CSS / MkDocs

This is a documentation site for my project.
Table of Contents
Angular筆記 ↵
第一章 前端網頁應用的利器Angular
用戶端開發的框架
| 開發者/發行年 | JavaScript or TypeScript | 市場占有率(名次) | |
|---|---|---|---|
Google/2010 |
Angular 2 之後轉向使用TypeScript |
2 |
|
Facebook/2013 |
JavaScript |
1 |
|
Evan You/2014 |
Vue3 計畫轉向使用TypeScript |
3 |
認識 Angular Framework
- 前端開發平台,前身是 Angular JS (2009)
- Google 開發出來的開放源 JavaScript 框架
- Angular 2 之後採用TypeScript (from Microsoft)
- 採用MVC 模式、SPA (Single Page Application)
- 注入依賴
- 模組、組件與模板
從JavaScript 到 TypeScript
- Angular 在2.0版之後採用 TypeScript (簡稱為 TS)
- TS 是 JavaScript (JS) 的 類別超集合,可編譯為純JavaScript
- 具備強型別、物件導向等特質
- 解決 JavaScript 諸如資料型別、命名空間...等問題
- 符合 ES6 (ECMA Script 6) 的規範
安裝 Angular Framework
-g安裝全域套件—save-dev只安裝在目前專案
建立 Angular 專案
ng new mod01 (1)
- ng new [專案名稱]
- --help : 條列出參數說明
- --routing : 預設為 true,是否產出
- --style : 指定樣式表的類型,例如CSS
- --skip-tests (-S) : 為true,不會建立 spec.ts 測試檔
- --inline-style (-s) : 為true,component.ts 文件內部定義 css
執行 Angular 專案
ng serve -o (1)
- ng serve <project>
- 建置應用程式並啟動專案,並根據程式的變更隨時重新建置
- <project> 可省略,省略時就是指建置目前資料夾的專案
- --help 說明
- —open (-o) 開啟 url 位置在預設瀏覽器
- —port 指定port位置,預設是4200
- —ssl 使用 https
建立多個專案工作區
同時開發多個專案,共用node_Module 資料夾
Workspace中建立專案
cd u2347ws
ng g app mod01 -S -s
- ng generate application [projectname]
- 在 workspace 的 “project” 子資料夾中建立新的應用程式
- —help:條列出參數說明
- —routing:預設為true,是否產生
- —style:指定樣式表的類型,例如css
- —skip-tests (-S):為true,不會建立 spec.ts 測試檔
- —inline-style (-s):為 true ,component.ts 文件內部定義 css
啟動順利
index.html
入口文件Angular應用程式的入口文件,包含HTML結構。
main.ts
啟動腳本Angular應用程式的JavaScript入口點,負責加載和啟動應用程式。
app.module.ts
主模組定義主要模塊文件,定義應用程式中的模塊、組件、指令等。
app.component.ts
根組件定義根組件,應用程式的主要組件。
app.component.html
根組件模板根組件的HTML模板文件,用於定義根組件的外觀和佈局。
第二章 Module 與 MVC 設計模型
模組化的目的:將巨大的應用程式拆開成一個一個的模塊,每個模塊可能包含特定功能的函式庫或元件。
JavaScript模組(.js):
- export: 此程式可用於其他模組
- import: 引入其他模組到此程式
- Angular 框架採用
- Angular模組 使用 @ngModule 定義,metadata 供編譯使用
import { NgModule } from '@angular/core';
import { BrowserModule } from '@angular/platform-browser';
import { AppRoutingModule } from './app-routing.module';
import { AppComponent } from './app.component';

@NgModule({
  declarations: [
    AppComponent,
  ],
  imports: [
    BrowserModule,
    AppRoutingModule,
  ],
  providers: [],
  bootstrap: [AppComponent]
})
export class AppModule { }
declarations:模組中可宣告的物件,像是Component、Directive、Pipe,此模組所擁有的元件
imports:使用外部模組,引入到這個模組才可使用
providers:加入服務提供者,會以執行階段動態注射的方式載入
bootstrap:指定Angular 入口元件,Angular會建立這個元件
常用模組
| 模組名稱 | 說明 |
|---|---|
BrowserModule |
@angular/platform-browser 在瀏覽器執行應用程式時 |
CommonModule |
使用 ngIf、ngFor |
FormsModule |
使用 ngModel及範本驅動表單時 |
ReactiveFormsModule |
使用 響應式表單 |
RouterModule |
使用 路由功能 |
HttpClientModule |
與 遠端伺服器 連結時需要用到 |
認識元件 (Component)
- 是 應用程式 的檢視元素
- 由 HTML、TypeScript、CSS 組合而成的
- 每個應用程式會有個 AppComponent
- 是應用程式的根元件 以 <app-root> 載入到 Index.html
- 每個元件要放入 @NgModule 的 declarations
甚麼是 MVC 架構
圖片源自 https://tw.alphacamp.co/blog/mvc-model-view-controller
Model、View、Controller 的區分,是希望能把應用程式的內部運作歸納成不同的部門,讓每個部門各自負責不同的關注點。具體的行為是「把不同意義的程式碼放在不同的檔案裡」。
- Model(模型):模型代表應用程式的資料結構。它處理應用程式的資料邏輯,並對應於資料庫、檔案系統或其他資料來源。模型負責檢索、儲存和修改資料,同時也定義了資料的結構和規則。
- View(視圖):視圖是應用程式的使用者介面的表示。它負責將模型中的資料呈現給使用者,通常以圖形界面(GUI)或網頁的形式呈現。視圖通常是動態的,它會根據模型的狀態而更新,以反映最新的資訊。
- Controller(控制器):控制器是模型和視圖之間的中介。它接收來自使用者的輸入,然後根據這些輸入更新模型的狀態或調用適當的視圖來呈現資料。控制器處理應用程式的流程控制和業務邏輯,並根據應用程式的需求來操作模型和視圖。
加入一個 component
結構型指令(STRUCTURAL DIRECTIVES)
Angular 使用結構化指令操作DOM。具有重塑DOM結構的能力,可能是新增、移除或是維護元素。
- 使用 * (星號) 為字首
- *ngFor:重複顯示每一個單項
- *ngIf:顯示項目,條件不符整個元素不存在
- *ngSwitch:類似 JavaScript 的 switch,只會有一個項目被顯示
step1:宣告一組陣列
step2:使用 *ngFor
step3:使用 *ngIf
export class Page1Component {
  // member = ['Jenny', 'Vivid', 'Kity', 'Linda'];
  member = [];
}
<div *ngIf='member.length>0;else noMember'>
  會員清單:
  <ul>
    <li *ngFor='let item of member;let i =index;let l=last'>
      {{i+1}}: {{item}}
    </li>
  </ul>
</div>
<ng-template #noMember>
  <div>目前沒有會員</div>
</ng-template>
step4:*ngFor 加入 last 屬性的處理
Note
*ngForOf 的屬性
*ngFor=”let item of member; let i = index; let o=odd”
- index 屬性
- 提供以零為起始的索引數字
- Boolean 類的屬性
- first、last:若是首筆或尾筆為 true
- even、odd:奇數、偶數時為 true
export class Page1Component {
  member = ['Jenny', 'Vivid', 'Kity', 'Linda'];
  // member = [];
}
<div *ngIf='member.length>0;'>
  會員清單:
  <ul>
    <li *ngFor='let item of member;let i =index;let l=last'>
      {{i+1}}: {{item}}
      <ng-container *ngIf='l'>
        <hr>
        <div>總共{{i+1}}筆</div>
      </ng-container>
    </li>
  </ul>
</div>
step5:使用差值呼叫函數
getName(idx: number): string {
    if (idx < 0 || idx > this.member.length) {
      return '索引超出範圍';
    }
    return this.member[idx];
  }
MVC 之 Model
- 負責與後端資料溝通的模型
- Ex.資料結構、存取資料的邏輯層
- Angular 以 class 實作 Model
(實作3)使用MVC
step1:Model
export class Picture {
 constructor(
        public PictureID: number,
        public Url: string,
        public Subject: string,
  public Author:string){

        }
}
export const picture = new Picture(1,"<圖片網址>","教堂","Kat Kelley");
step2: MVC - VC (Component)
@Component({
 selector:'page2',
 templateUrl:'./page2.component.html',
 styles: []
})

export class Page2Component implements OnInit {
 public pic = picture
 constructor(){}
 ngOnInit():void {

 }
}
<div>
    ID: {{ pic.PictureID }} -
    Subject: {{ pic.Subject}} -
    Author: {{ pic.Author}}
    <br/>
    <img src="{{pic.Url}}" height="200" />
</div>
step3:在 app.component 中加入 page2
step3:物件陣列 / *ngFor / MVC
第三章 初探 Angular Route & Navigation
- 藉由地址列輸入 URL,將瀏覽器導向相對應的頁面
- 透過超連結或是連結 導向新的頁面
- 使用瀏覽器的後退及前進按鈕,導向歷史紀錄的前後頁
建置具 Routing 能力的 App
step 1: 建置專案時,啟用 routing 功能
step 2: 建置專案所需的元件
step 3: 設定 Route 的資訊
step 4: 選單 導引頁面
啟用 routing 功能
- —routing
- 產生routing 相關元件
- 若沒有指定,會跳出詢問句
- 回答 y 一樣會產生 routing 相關元件
- 回答 n 則不會產生
-
在既有專案加入 routing 模組
-
Routes
export const routes: Routes = [
  {path: 'p1', component: Page1Component, title: 'Page1',data: ['page1']},
  {path: 'p2', component: Page2Component, title: 'Page2',data: ['page2']},
];
- 定義路由的配置,是一組Route的陣列
- Route 包含以下屬性:
- path: 路徑
- component: 若符合路徑時要啟動的元件
- data: 開發人員可以自訂額外的資料,可以不傳遞
- …
路徑指向 href vs routerLink
<a href="page1">Page1</a>
<a routerLink="page1">Page1</a>
<a [routerLink]="['../','products']">Products</a>
<a [routerLink]="['/','customer','Company1']">Company1</a>
<a [routerLink]="[{outlets:{left:['[age1]']}}]">Page1</a>
- href
- 傳統 HTML 轉頁用,用在路由也有效果
- routerLink
- Angular 路由專用的屬性
- 設定路徑區段,例如:’../product’ or ‘/customer/Company1’
- 可以指定輸出到 特定的 router-outlet
指定路由元件輸出的位置
搭配 *ngFor 產生選單 (推薦)
第四章 HTML Binding 與 Event 的處理
綁定 (Binding)
屬性綁定(DOM Property Binding)
| 方式 | 範例 | html -?- ts |
|---|---|---|
| 文字插值 Text Interpolation | <p>{{ value }}</p> |
|
| 屬性繫結 Property Binding | [disabled] = “value” |
|
| 事件繫結 Event Binding | (click)=”add()” |
|
| 雙向繫結 Two-Way Binding | [(ngModel)] = “value” |
DOM 屬性綁定
DOM Component
| property 名稱 | 範例 |
|---|---|
| Emelent | <img [src]="imageUrl"> |
| Component | <app-child [name]="value1"></app-child> |
| Class | <p [class.myClass1]="isSuccess”>成功</p> |
| Attribute | <td [attr.colspan]="1 + 1">總計</td> |
| Style | <p [style.color]="(isSuccess)?'red':'gray'">Test</p> |
| Directive | <li [ngClass]="{myClass1: isSuccess}"></li> |
Attribute 綁定 (HTML Attribute Binding)
多數的HML Attribute 會對應到 DOM Property,某些 Attribute 只是單純的 Attribute
- Ex. ARIA, SVG, Table 跨列跨行 (span) 的
Success
NgClass 與 NgStyle
Angular 提供可用來動態改變 DOM 元素 CSS 的指令。
| 來源 | 範例 |
|---|---|
| Native Attributes | <p class="myClass1" style="border: 1px;"></p> |
| Angular Bindings | <p [class.myClass1]="isSuccess" [style.border]="isSuccess"></p> |
| ngClass | <p [ngClass]="{'myClass1': isSuccess, 'myClass2': false}"></p> |
| ngStyle | <p [ngStyle]="{'color': 'red'}"></p> |
事件綁定 (Event Binding)
範例:目標事件名稱為 click ,呼叫方法為 SayHi()。
相當於
事件綁定偵聽按鈕的單擊事件,並在單擊發生時呼叫SayHi()方法。
事件的傳遞 (Bubbling)
- 事件傳遞由內向外
測試: Button
$event 事件處理訊息
- 相當於DOM 物件的 event 物件
- 觸發事件的目標物件
- event 物件
- event.target:原始目標
- event.currentTarget:目前這個目標
測試: Button
$event 提供 DOM Event 的相關方法
- preventDefault
- 取消事件預設的行為
- stopPropagation
- 取消事件傳遞行為
- stopImmediatePropagation
- DOM Level 3 新增的功能
- 馬上取消所有的事件傳遞行為
下拉清單 使用 $event.target
- 觸發事件的目標物件
- 如下面範例,$event 可以取得 select 物件
你選擇的是:
表單互動的綁定能力 - ngModel
- 提供表單控制項的綁定能力
- 引入 NgModule,FormsModule
- app.component.ts
- 匯入
[ngModel]、(ngModelChange)
- Source-to-view View-to-source
- [ngModel]
- 設定 html 元素的 value 屬性
- (ngModelChange)
你選擇的是:{{ result }}
<select [ngModel] = 'result' (ngModelChange)="result=$event">
    <option value="0101">Java Script</option>
    <option value="0102">Type Script</option>
    <option value="0103">Angular</option>
</select>
雙向綁定--使用 ngModel
- View-to-source-to-view
- [()] 又稱為 Banana in a Box
- 使用[(ngModel)] 一次搞定
你選擇的是:{{ result }}
<select [(ngModel)] = 'result'>
    <option value="0101">Java Script</option>
    <option value="0102">Type Script</option>
    <option value="0103">Angular</option>
</select>
自訂元素的雙向綁定
- [(ngModel)] 只能用在 HTML 原生的元素
- 無法使用在自訂元素
- @Input
- 宣告自訂元素的輸出屬性
- @Output
- 宣告自訂元素的事件通知
- EventEmitter
- 定義事件的傳遞訊息型別
-
雙向綁定須注意
- @Output 名稱必須 是 @Input 名稱 + 事件名稱
- Ex:
-
EventEmitter 使用 emit 傳遞事件參數
-
search-box.component.html
-
app.component.ts
-
app.component.html
<searchBox [searchText]="mySearch" (searchTextChanged)="mySearch=$event"></searchBox>

  <h3 *ngIf="mySearch.length > 0">
    找到了 {{mySearch}}!!
  </h3>
Style 綁定 (Style Binding)
使用 [style.attribute]
<searchBox [searchText]="mySearch" (searchTextChanged)="mySearch=$event"></searchBox>

<h3 [style.border]="mySearch.length > 0 ? 'solid 3px blue':'solid 3px red'">
    <span *ngIf="mySearch.length > 0;else notFound">找到了</span>
    <ng-template #notFound>沒找到喔</ng-template>
</h3>
ngStyle 綁定
- 當有多個 style 要設定時,使用ngStyle
- app.component.ts
mySearch:string='';
  isTouch: boolean = false;
  isFound: boolean = false;
  resultStyles = {};
  onTextChange(search: string) {
    this.isTouch = true;
    this.isFound = search.length > 3;
    this.resultStyles = {
      'border': this.isFound ? 'solid 3px blue' : 'solid 3px red',
      'color': this.isFound ? 'black' : 'red',
      'background-color': this.isFound ? 'yellow' : 'white'
    }
  }
- app.component.html
<searchBox [searchText]="mySearch" (searchTextChanged)="onTextChange($event)"></searchBox>

<h3 [ngStyle]='resultStyles' *ngIf="isTouch">
    <span *ngIf="isFound; else notFound">找到了{{mySearch}}!!</span>
    <ng-template #notFound>沒找到ㄡ...</ng-template>
</h3>
- span 改用 ng-container
<searchBox [searchText]="mySearch" (searchTextChanged)="onTextChange($event)"></searchBox>

<h3 [ngStyle]='resultStyles' *ngIf="isTouch">
    <ng-container *ngIf="isFound; else notFound">找到了{{mySearch}}!!</ng-container>
    <ng-template #notFound>沒找到ㄡ...</ng-template>
</h3>
ng-container / ng-template
- 兩者皆不會顯示在HTML上
- ng-container
- DOM 的容器,Tag 最後不會顯示在HTML
- ng-template
- 不會直接顯示,透過參考才會呈現
- 是被動的
- 必須被參考到才會啟動
(實作) 綜合練習 - 建立模組
Step 1:加入 Class Model,定義資料內容
Student.ts
export class Student {
  id: number = 0;
  Name: string = "";
  Birthday: Date = new Date();
}

export const students: Student[] = [
  { id: 101, Name:"Mary", Birthday: new Date(2007,3,15) },
  { id: 102, Name:"Lisa", Birthday: new Date(1997,7,15) },
  { id: 103, Name:"Andy", Birthday: new Date(2003,8,15) },
  { id: 104, Name:"Jenny", Birthday: new Date(2022,2,15) },
  { id: 105, Name:"Kiki", Birthday: new Date(1999,4,15) },
]
Step 2: 建立 Component
- page6.component.ts
import { Student, students } from '../student';
// 部分省略

export class Page6Component implements OnInit {
  student: Student[] = students;
  thisMonth: number;
  constructor() {
    this.thisMonth = new Date(Date.now()).getMonth();
  }

  ngOnInit(): void {

  }
}
Step 3:使用 *ngFor
- page6.component.html
<div class='table'>
  <div class='row' *ngFor="let st of student; let i = index; let o=odd" [style.background-color]='o?"yellow":""'>
    <div class='col'>No.{{i+1}}</div>
    <div class='col'>{{st.id}}</div>
    <div class='col'>{{st.Name}}</div>
    <div class='col'>{{st.Birthday | date:'MM-dd-yyyy'}}</div>
  </div>
</div>
Step 4: 使用 *ngSwitch
- page6.component.html
<div class='col'>
      <ng-container [ngSwitch]="st.Birthday.getMonth()">
        <span *ngSwitchCase="thisMonth" style='color: red;'>本月壽星</span>
        <span *ngSwitchCase="thisMonth+1" style='color: blue;'>生日快到了!!</span>
        <span *ngSwitchDefault style="font-size:x-small">在等等吧!</span>
      </ng-container>
</div>
*ngSwitch
- 類似 javascript 的 switch 指令
- 配合 ngSwitchCase、ngSwithchDefault
- 呈現符合條件的元素
第五章 關於 UI 的那些是 —元件、指令、Pipe
認識元件的生命週期
constuctor
生命週期是在執行 constructor 之後才開始
ngOnChanges
第一次發生 @Input() 繫結時就會觸發 (比 ngOnInit 早),之後每發生 @Input() 繫結時就會觸發一次
ngOnInit
會在第一次執行 ngOnChanges() 事件後觸發
ngDoCheck
每次執行變更偵測時,都會自動執行 ngDoCheck()事件
ngAfterContentInit
當 Content 裡面所有元件都 初始化完成後 觸發此事件
ngAfterContentChecked
當 Content 裡面所有元件都 完成變更偵測機制後 觸發此事件
ngAfterViewInit
當 View 裡面所有元件都 初始化完成後 觸發此事件
ngAfterViewChecked
當 View 裡面所有元件都 完成變更偵測機制後 觸發此事件
ngOnDestroy
在元件 摧毀之前 會執行此事件
ng-content
- 內容投射
投射全部內容 - 使用 Select,指定內容投射
<app-ng-content>
<!--定義class child-header -->
<div class="child-header">
<strong>This is Parent Templage Define Header</strong>
</div>
<!--定義屬性 child-body -->
<div child-body>
這個是寫在Parent的Div,需在Child端透過宣告 <ng-content></ng-content> 的方式傳入
</div>
<!--自定義Html Attribute detail-type & value = child-footer -->
<div detail-type="child-footer">
<strong>This is Parent Templage Define Footer</strong>
</div>
</app-ng-content>
<fieldset>
  <legend>Ng Conent 範例</legend>
  <!-- 多點嵌入 透過class選擇 -->
  <ng-content select=".child-header"></ng-content>

  <!-- 多點嵌入 透過屬性選擇 -->
  <ng-content select="[child-body]"></ng-content>

  <!-- 多點嵌入 透過自定義Html Attribute & value 選擇 -->
  <ng-content select="[detail-type=child-footer]"></ng-content>
</fieldset>
- 執行結果如下圖
配置內容查詢
- 取得符合的type 或是 名字 (#name)
- 在 ngAfterContentInit 之前取得內容查詢
- @ContentChild、@ContentChildren
@使用ContentChildren
@ContentChildren('span') spans: any;

  ngAfterContentInit() {
    console.log('ngAfterContentInit - ');
    this.spans.forEach((element: any) => {
      console.log("\t", element);
    })
  }

  ngAfterContentChecked(): void {
    console.log("ngAfterContentChecked -");
    this.spans.forEach((element: any) => {
      console.log("\t", element);
    });
  }
DOM 的檢視查詢
- 異動檢查器
- 會在檢視的DOM當中取得符合 type 或是 名字 (#name)
- 在 ngAfterViewInit 之前指定檢視查詢
- @ViewChild
- 取得第一個符合的
- @ViewChildren
- 取得一組符合的 QueryList
認識 Directive
- Components
- 即是 前面所學的 Components 與 template
- 結構指令
- 控制 DOM 結構
- EX: ngFor , ngIf
- 屬性指令
- 使用在元素的 attribute 上
- Ex: ngStyle , ngClass
自訂屬性指令
- 建立指令的終端機命令
- 使用 @Directive 宣告自訂的 Attribute 名稱
自訂 Directive 舉例
===".ts"
```ts
import {Directive }from '@angular/core';

@Directive({
selector: '[inTheBox]'
})
export class InTheBOxDirective {
constructor(private el: ElementRef) {
    this.putInTheBox("solid 2px red");
}

private putInTheBox( borderStyle: string ){
    this.el.nativeElement.style.border = borderStyle;
}
}
```
===".html"
```html
<h1 #title1 inTheBox>{{ title }}</h1>
```
@HostListener
- 提供元件的處理方法
-
語法:
-
@Input 提供外部元素屬性設定
-
語法:
使用 @HostListener 處理 滑鼠事件
- 滑鼠移入時,加上圖框 mouseenter
- onMouseEnter()
- 離開時,移除圖框 mouseleave
- onMouseLeave()
 @HostListener("mouseenter") onMouseEnter() {
    if (!this.borderStyle)
      this.borderStyle = "solid 2px red"
    this.putInTheBox(this.borderStyle);
 }
 @HostListener("mouseleave") onMouseLeave() {
    this.putInTheBox("none");
 }
定義額外的輸入屬性
- 使用 @Input 定義屬性
export class InTheBoxDirective {
    @Input() borderStyle: string = "";
    @HostListener("mouseenter") onMouseEnter() {
        if (!this.borderStyle)
        this.borderStyle = "solid 2px red"
        this.putInTheBox(this.borderStyle);
    }
    @HostListener("mouseleave") onMouseLeave() {
        this.putInTheBox("none");
    }
    private putInTheBox(borderStyle: string) {
        this.el.nativeElement.style.border = borderStyle;
    }
}
使用 @Input 參數指定成 selected
export class InTheBoxDirective {
@Input('inTheBox') borderStyle: string = "";

@HostListener("mouseenter") onMouseEnter() {
    if (!this.borderStyle)
    this.borderStyle = "solid 2px red";
    this.putInTheBox(this.borderStyle);
}
@HostListener("mouseleave") onMouseLeave() {
    this.putInTheBox("none");
}
private putInTheBox(borderStyle: string) {
    this.el.nativeElement.style.border = borderStyle;
}
}
Pipe 管道
- 用來對於 字串、日期、數字、貨幣金額 … 等資料進行轉換及格式化
- 內建的管道有:
- UpperCasePipe :uppercase //大寫
- LowerCasePipe :lowercase //小寫
- DatePipe :date //日期
- CurrencyPipe :currency //貨幣
- NumberPipe :number //數字
- PercentPipe :percent //百分
套用各類型的 pipe
<div>UpperCase:{{ vString | uppercase }}</div>
<div>LowerCase:{{ vString | lowercase }}</div>
<div>Date: {{ vDate | date }} </div>
<div>Date 'shortDate': {{ vDate | date:'shortDate' }} </div>
<div>Date 'yyyy-MM-dd': {{ vDate | date:'yyyy-MM-dd' }} </div>
<div>currency: {{ vMoney | currency }} </div>
<div>number: {{ vNumber | number }} </div>
<div>number: {{ vNumber | number:'1.0-0' }} </div>
<div>number: {{ vNumber | number:'3.1-5' }} </div>
<div>number: {{ vNumber2 | number }} </div>
<div>number: {{ vNumber2 | number:'1.0-0' }} </div>
<div>number: {{ vNumber2 | number:'3.1-5' }} </div>
<div>number: {{ vNumber2 | number:'3.5-5' }} </div>
自訂轉換的 Pipe:美金兌換台幣
第六章 表單 (Form)
兩種表單的差異
| 響應式 (Reactive Form) | 範本驅動 (Template-driven Form) | |
|---|---|---|
| 建立表單模型 | 明確的在Component建立FormControl | 隱含式,使用指令(Diretive)在Template之中 |
| 資料模型 | 結構化、不可變 | 非結構化、可變 |
| 資料流 | 同步 | 非同步 |
| 表單驗證 | 函式 | 指令 |
表單設計的選擇
- Reactive Form
- 可擴展性
- 可重用性
- 可測試性
- Template-driven Form
- 簡單容易
- 擴展能力低
共同的基礎組件
- FormControl
- 管理單一輸入項 (input、select) 的值及輸入驗證狀態
- FormGroup
- 管理一組輸入項 (FormControl、FormGroup、FormArray) 的值及輸入驗證狀態
- FormArray
- 管理輸入項陣列的值及輸入驗證狀態
- FormBuilder
- 用來建立 FormCotrol 的方法
graph LR;
  A[class] --> B[classname];
  A --> C[teacher];
  A --> D[students];
  D --> E[student];
  D --> F[student];
  E --> G[id];
  E --> H[name];
  F --> I[id];
  F --> J[name];

  style A fill:#FF0000,stroke:#9370DB,stroke-width:1px;
  style E fill:#FF0000,stroke:#9370DB,stroke-width:1px;
  style F fill:#FF0000,stroke:#9370DB,stroke-width:1px;

  style B fill:#28a745,stroke:#9370DB,stroke-width:1px;
  style C fill:#28a745,stroke:#9370DB,stroke-width:1px;
  style G fill:#28a745,stroke:#9370DB,stroke-width:1px;
  style H fill:#28a745,stroke:#9370DB,stroke-width:1px;
  style I fill:#28a745,stroke:#9370DB,stroke-width:1px;
  style J fill:#28a745,stroke:#9370DB,stroke-width:1px;

  style D fill:#007bff,stroke:#9370DB,stroke-width:1px;
紅色:FormGroup | 綠色:FormControl | 藍色:FormArray
Reactive Form 的相關 Directive
- 用於將相對物件同步到DOM元素
- FormControlDirective
- FormControlName
- FormGroupDirective
- FormGroupName
- FormArrayName
以 Reactivate Forms 製作簡單的表單
- App.modules.ts 需引用 ReactiveFormsModule
import { ReactiveFormsModule } from '@angular/forms';

@NgModule ({
 ...
 import: [
  BrowserModule,
  ReactiveFormsModule
 ],
 ...
})
- 定義 Model 作為表單資料來源
export class MeetingRoom {
  constructor(
   public id: number,
  public name: string,
  public size: string,
  public projector?: boolean,
  public TV?: boolean
  ) { }
}
- 使用 FormBuilder 建立 Form Controls
export class Page1Component {
  // 定義一個 capacity 陣列,包含不同的會議室容量選項。
  public capacity = ['5人', '10人', '20人', '30人', '40人'];

  // 宣告一個 FormGroup 類型的變數 meetingRoomForm,用於管理表單。
  public meetingRoomForm: FormGroup;

  // 宣告一個 MeetingRoom 類型的變數 meetingRoom,用於存儲會議室資訊。
  public meetingRoom: MeetingRoom;

  // 在構造函數中,使用 FormBuilder 來建立表單。
  constructor(public builder: FormBuilder) {
    // 創建一個新的 MeetingRoom 實例,並賦值給 meetingRoom 變數。
    this.meetingRoom = new MeetingRoom(101, '哥多華', this.capacity[2], false, true);

    // 使用 FormBuilder 的 group 方法來定義表單的結構和規則。
    this.meetingRoomForm = this.builder.group({
      'id': ['', [Validators.required]], // 表單控件 id,必填。
      'name': ['', [Validators.required]], // 表單控件 name,必填。
      'size': [''], // 表單控件 size,非必填。
      'projector': [''], // 表單控件 projector,非必填。
      'TV':[''] // 表單控件 TV,非必填。
    })
  }

  // 在組件初始化時,使用 setValue 方法將 meetingRoom 的資訊填充到表單中。
  ngOnInit(): void {
    this.meetingRoomForm.setValue(this.meetingRoom);
  }

  onSubmit() {
   // 將表單的值賦給 meetingRoom 變數。
   this.meetingRoom = this.meetingRoomForm.value;
 }
}
- Template 中設定 formCotrolName
<div class='container'>
  <h1>Meeting Room Form</h1>
  <form [formGroup]="meetingRoomForm" (ngSubmit)='onSubmit()'>
    <div class='form-group'>
      <label for="name">名稱</label>
      <input type="text" class='form-control' formControlName="name">
    </div>
    <div class='form-group'>
      <label for="size">容納人數</label>
      <select class='form-control' formControlName="size">
        <option *ngFor="let cap of capacity" [value]='cap'> {{ cap }} </option>
      </select>
    </div>
    <div class='container'>
      <div class='form-check form-check-inline'>
        <label for="projector" class='form-check-label'>投影機</label>
        <input type="checkbox" class='form-check-input' formControlName="projector">
      </div>
      <div class='form-check form-check-inline'>
        <label for="TV" class='form-check-label'>電視</label>
        <input type="checkbox" class='form-check-input' formControlName="TV">
      </div>
    </div>
    <button type='submit' class='btn btn-success'>Submit</button>
  </form>
</div>
- 觀察 meetingRoomForm.value 與 meetingRoom 的改變
<div class='container'>
  <div>meetingRoomForm.value: {{ meetingRoomForm.value | json }}</div>
  <div>meetingRoom: {{ meetingRoom | json }} </div>
</div>
meetingRoomForm.value 會隨著用戶與表單的互動而實時更新,而 meetingRoom 的值則會在表單提交時更新,反映用戶提交的最終數據。
以Template-Driven 製作表單
- app.module 引入 FormsModule
import { FormsModule} from '@angular/forms';

@NgModule ({
 ...
 import: [
  BrowserModule,
  FormsModule
 ],
 ...
})
- 初始化 Model 的值
public meetingRoom: MeetingRoom;
public capacity = ['5人', '10人', '20人', '30人', '40人'];

constructor() {
    this.meetingRoom = new MeetingRoom(101,'哥多華',this.capacity[2],false,true);
}
- 使用 [(ngModel)] 及 name 指定
<div class='container' *ngIf="!submitted">
  <h1>會議室基本資料</h1>
  <form #roomForm='ngForm' (ngSubmit) = "onSubmit(roomForm)">
    <div class='form-group'>
      <label for="name">名稱</label>
      <input type="text" class='form-control' id='name' name='name'[(ngModel)]="meetingRoom.name">
    </div>
    <div class='form-group'>
      <label for="size">容納人數</label>
      <select class='form-control' name='size' [(ngModel)]="meetingRoom.size">
        <option *ngFor="let cap of capacity" [value]='cap'> {{ cap }} </option>
      </select>
    </div>
    <div class='form-group'>
      <div class='form-check form-check-inline'>
        <input type="checkbox" class='form-check-input' name="projector" [(ngModel)]="meetingRoom.projector">
        <label for="projector" class='form-check-label'>投影機</label>
      </div>
      <div class='form-check form-check-inline'>
        <input type="checkbox" class='form-check-input' name="TV" [(ngModel)]="meetingRoom.TV">
        <label for="TV" class='form-check-label'>電視</label></div>
    </div>
    <button type='submit' class='btn btn-success m-3'>Submit</button>
  </form>
</div>
- 傳遞ngForm
- 使用 #宣告變數 存入 ngForm 的值
- ngForm 管理 提供表單 及 ngModel 項目 name 的屬性,使其能夠彼此參考
認識 form 與 ngForm
- 繫結到表單
- FormGroup 的最上層
- @OutPut
- ngSubmit: 按下 submit 按鈕時的事件
- @Input
- control: FormGroup 的實體
- controls {[key:string]:AbstractControl}:控制項的對應
novalidate / ngNativeValidate
- novalidate
- 避免預設的 HTML5 DOM 的驗證 UI 呈現
- 目的:讓開發者可以自訂輸入驗證的提醒
- ngNativeValidate
-
開啟預設的 HTML5 DOM 的驗證UI呈現
- 使用 ngNativeValidate
<form #roomForm='ngForm' (ngSubmit) = "onSubmit(roomForm)" ngNativeValidate>
    <div class='form-group'>
      <label for="name">名稱</label>
      <input type="text" class='form-control' id='name' name='name'
        [(ngModel)]="meetingRoom.name" required>
    </div>
    ...略...
- 使用 novalidate
<form #roomForm='ngForm' (ngSubmit) = "onSubmit(roomForm)">
    <div class='form-group'>
      <label for="name">名稱</label>
      <input type="text" class='form-control' id='name' name='name'
       [(ngModel)]="meetingRoom.name" required>
    </div>
    ...略...
實作驗證提醒
- 去掉 ngNativeValidate
- 了解 輸入過程 Angular 提供那些資訊
- 利用這些訊息呈現驗證提醒
ngModel 追蹤輸入項目和驗證能力
- 是否輸入項目已經被進入過了?
- Yes:ng-touched
- No:ng-untouched
- 是否輸入項已經被變更了
- Yes:ng-dirty
- No:ng-pristine
- 是否輸入項已經驗證通過?
- Yes:ng-valid
- No:ng-invalid
如何取得ngModel 的驗證資訊
<input type="text" class='form-control'[(ngModel)]="meetingRoom.name" required
 name="roomName" #roomName="ngModel">
- 使用 # 命名並指向 ngModel
- 必須搭被 [{ngModel}] 使用
- 該物件便具有 ng-teach、ng-dirty、ng-valid … 等 bool 屬性
- 可做為驗證輸入狀態的檢查
查看 ngModel 添加的 className
- required
<input type="text" class='form-control' id='name' name='name'
    [(ngModel)]="meetingRoom.name" required>
- 透過 style 設定 驗證的呈現效果
-
.ng-valid[required], .ng-valid.required:當一個必填的表單控件通過驗證時,它的左邊框會顯示為綠色。 -
.ng-dirty:not(form):當表單控件的值被修改過(變得 “dirty”)且不是<form>元素時,它的邊框會顯示為藍色。 -
.ng-invalid:not(form):當一個表單控件沒有通過驗證時,它的左邊框會顯示為紅色。
<style>
  .ng-valid[required],
  .ng-valid.required {
    border-left: 5px solid #42A948;
    /* green */
  }
  .ng-dirty:not(form) {
    border: 1px solid blue;
  }
  .ng-invalid:not(form) {
    border-left: 5px solid #a94442;
    /* red */
  }
</style>
- 驗證錯誤時的提醒訊息
<div class='form-group'>
      <label for="name">名稱</label>
      <input type="text" class='form-control' id='name' name='name'
         [(ngModel)]="meetingRoom.name" #roomName='ngModel' required>
      <div *ngIf="roomName.invalid" class='alert alert-danger'>名字欄位不可空白</div>
</div>
- 輸入驗證的視覺回饋
newMeetingRoom() {
  //設定新的會議室初始值
    this.meetingRoom = new MeetingRoom(102, ", ", this.capacity[1],false,true);
}
<button type='button' class='btn btn-primary'
    (click)=' roomForm.reset();newMeetingRoom();'>新增會議室</button>
- 提交表單按鈕
- 在 form 元素加入 ngSubmit 指定 onSubmit 事件處理程序
- 透過綁定 disabled 與 roomForm 變數參考表單是否通過驗證
- 檢查輸入驗證是否通過決定是否允許按下 Submit 按鈕
<form #roomForm='ngForm' (ngSubmit) = "onSubmit(roomForm)" >
 ...

 <!-- [disabled] 是否禁用 HTML 元素 -->
 <button type='submit' class='btn btn-success m-3'
     [disabled]='roomForm.form.invalid'>Submit</button>
- 切換兩個表單的區域
- submitted 變數切換內容
<div class='container' *ngIf="!submitted">
  <h1>會議室基本資料</h1>
  ...略...
</div>

<div class='container' *ngIf="submitted">
  <h2>以下是你提交的資訊</h2>
  <div class='table'>
    <div class='row'>
      <div class='col-4'>名稱</div>
      <div class='col-6'> {{ meetingRoom.name }} </div>
    </div>
    <div class='row'>
      <div class='col-4'>容納人數</div>
      <div class='col-6'> {{ meetingRoom.size }} </div>
    </div>
    <div class='row'>
      <div class='col-4'>投影機</div>
      <div class='col-6'> {{ meetingRoom.projector }} </div>
    </div>
    <div class='row'>
      <div class='col-4'>電視</div>
      <div class='col-6'> {{ meetingRoom.TV }} </div>
    </div>
  </div>
  <div>
    <button class='btn btn-primary' (click)='submitted=false'>編修</button>
  </div>
</div>
第七章 表單驗證
表單驗證的用意
- 確認使用者輸入是否正確
- 降低因輸入錯誤而產生多餘的網路往返
- 降低伺服器不必要的負擔
有哪些輸入需要驗證
- 必要欄位
- 姓名、身分證字號、統一編號
- 輸入值必須在特定範圍
- 年齡限制、租借日期、生日
- 輸入值必須符合特定格式
- 電話號碼、email
- 長度限制
- 姓名的長度、產品名稱的長度 …
HTML5 提供的基本驗證
- required
- minlength、maxlength
- pattern
- min、max
Angular 內建的驗證屬性
- required
- minlength、maxlength
- pattern
ngModel 提供驗證檢查的相關功能
- errors:驗證錯誤的訊息
- required,檢查若此欄位是空白,則傳回 true
- minlength、maxlength,檢查此欄位最短及最長的長度,不符合則傳回 true
- pattern,使用 RegEx 驗算文字是否符合規則,不符合則傳回 true
- email,欄位必須符合 email 規則,若不符合則傳回 true
(實作) 使用 ngModel 的 Errors 屬性
- 匯入 FormsModule
- app.module.ts
import { FormsModule } from '@angular/forms';

@NgModule({
    ...
  imports: [
    BrowserModule,FormsModule
  ],
  ...
})
- 初始化文件
- app.component.ts
rentRoom = { name: '', number: '', extNo: '', startDate: '', endDate: '' };
capacity = ['5人', '10人', '20人', '30人', '40人'];
- 初始畫面
- app.component.html
<div class="container" style="margin: 20px">
  <h1>會議室預約單</h1>
  <form #f='ngForm' (ngSubmit)='f.form.valid'>
    <div class="form-group">
      <label for="name">租借人姓名</label>
      <input type="text" class="form-control" required name="name"
      [(ngModel)]='rentRoom.name' #name='ngModel' minlength="4" placeholder="請輸入租借者的姓名">
      <div *ngIf="name.invalid && (name.dirty || name.touched)" class='alert alert-danger'>
        <div *ngIf="name.errors?.['required']">必須輸入租借人!!</div>
        <div *ngIf="name.errors?.['minlength']">名字長度必須大於4</div>
      </div>
    </div>
    <div class="form-group">
      <label for="number">參與人數</label>
      <select class="form-control" required name="number"
      [(ngModel)]='rentRoom.number' #number='ngModel'>
        <option value="">請選擇參與人數</option>
        <option *ngFor="let cap of capacity" [value]='cap'> {{cap}} </option>
      </select>
    </div>
    <div *ngIf="number.invalid && (number.dirty || number.touched)" class='alert alert-danger'>
      <div *ngIf="number.errors?.['required']">請選擇參與人數!!</div>
    </div>

    <div class="form-group">
      <label for="size">分機號碼</label>
      <input type="number" class="form-control" placeholder="租借者的辦公室分機號碼" [(ngModel)]='rentRoom.extNo'
      #extNo='ngModel' required CheckExtNo name="extNo" pattern="[0-9]{4}" title="4個數字">
      <div *ngIf="extNo.invalid && (extNo.dirty || extNo.touched)" class='alert alert-danger'>
        <div *ngIf="extNo.errors?.['required']">分析號碼必須填寫</div>
        <div *ngIf="extNo.errors?.['pattern']">分機號碼必須是四個數字</div>
        <div *ngIf="extNo.errors?.['CheckExtNo']">
          {{ extNo.errors?.['CheckExtNo'].requiredValue}}
        </div>
      </div>
    </div>
    <div class="form-group" ngModelGroup='rentDate' #rentDate='ngModelGroup'
    [CheckEndDate]='["startDate", "endDate"]'>
      <label for="size">租借期間</label>
      <input type="date" class="form-control" placeholder="起始時間" required name="startDate" [(ngModel)]='rentRoom.startDate' #startDate='ngModel'>
      <input type="date" class="form-control" placeholder="退還時間" required name="endDate" [(ngModel)]='rentRoom.endDate' #endDate='ngModel'>
      <div *ngIf="rentDate.invalid && (rentDate.dirty || rentDate.touched)" class='alert alert-danger'>
        <div *ngIf="startDate.errors?.['required'] || endDate.errors?.['required']">租借期間必須填寫</div>
        <div *ngIf="rentDate.errors?.['CheckEndDate']">
          {{ rentDate.errors?.['CheckEndDate'].requiredValue }}
        </div>
      </div>
    </div>
    <div>
      <button type="submit" [disabled]='f.invalid'
      [ngClass]="{'btn':true, 'btn-success':f.valid, 'btn-warning':f.invalid}">Submit</button>

      <p>Form value:{{f.value|json}}</p>
      <p>Form status:{{f.status|json}}</p>
      <p>rentRoom:{{rentRoom|json}}</p>
    </div>
  </form>
</div>
(實作) 檢查分機號碼必須介於 1000 - 1999 之間
自訂驗證項的指令
- NG_VALIDATORS 的提供者
- 自訂驗證程序需要註冊此提供者
- multi 必須設定為true
-
在@Directive 指定 providers 相關資訊
- 產生一個 Directive
- 指定指令的提供者
- check-ext-no.directive.ts
@Directive({
  selector: '[CheckExtNo]',
  providers: [{
    provide: NG_VALIDATORS,
    useExisting: CheckExtNoDirective,
    multi: true
  }]
})
- 實作 Validator 介面
- check-ext-no.directive.ts
export class CheckExtNoDirective implements Validator{

  constructor() { }

  validate(control: AbstractControl): ValidationErrors | null {
    let extNo: number = parseInt(control.value);
    let result = null;
    if (extNo < 1000 || extNo > 1999) {
      result = {
        'CheckExtNo': {
          actualValue: extNo,
          requiredValue:'分機號碼必須介於 1000-1999 之間'
        }
      }
      return result;
    }
    return null;
  }
}
- 套用到 HTML
- app.component.html
      <input type="number" class="form-control" placeholder="租借者的辦公室分機號碼"
      [(ngModel)]='rentRoom.extNo' #extNo='ngModel' required CheckExtNo name="extNo"
      pattern="[0-9]{4}" title="4個數字">

      <div *ngIf="extNo.invalid && (extNo.dirty || extNo.touched)" class='alert alert-danger'>
        <div *ngIf="extNo.errors?.['required']">分析號碼必須填寫</div>
        <div *ngIf="extNo.errors?.['pattern']">分機號碼必須是四個數字</div>
        <div *ngIf="extNo.errors?.['CheckExtNo']">
          {{ extNo.errors?.['CheckExtNo'].actualValue}}
        </div>
      </div>
(實作) 多個欄位比對檢查
- 產生一個 Directive
- 指定指令的提供者
-
check-end-date.directive.ts
-
實作 Validator
export class CheckEndDateDirective { @Input('CheckEndDate') mustGT: string[] = []; constructor() { } validate(control: AbstractControl): ValidationErrors | null { let fg: FormGroup = <FormGroup>control; let startCtlName: string = this.mustGT[0], endCtlName: string = this.mustGT[1]; const startCtl = fg.controls[startCtlName]; const endCtl = fg.controls[endCtlName]; if (!startCtl || !endCtl) { return null; } let startDate = Date.parse(startCtl.value); let endDate = Date.parse(endCtl.value); let result = null; if (startDate >= endDate) { result = { "CheckEndDate": { actualValue: `起始日期: ${startDate}, 歸還日期: ${endDate}`, requiredValue: '歸還日期必須大於起始日期' } } } return result; } } -
修改 ngModelGroup 加入 CheckEndDate 並傳入要比較的兩個欄位
-
app.component.html
    <div class="form-group" ngModelGroup='rentDate' #rentDate='ngModelGroup'
    [CheckEndDate]='["startDate", "endDate"]'>
      <label for="size">租借期間</label>
      <input type="date" class="form-control" placeholder="起始時間" required
          name="startDate" [(ngModel)]='rentRoom.startDate' #startDate='ngModel'>
      <input type="date" class="form-control" placeholder="退還時間" required
          name="endDate" [(ngModel)]='rentRoom.endDate' #endDate='ngModel'>
      <div *ngIf="rentDate.invalid && (rentDate.dirty || rentDate.touched)" class='alert alert-danger'>
        <div *ngIf="startDate.errors?.['required'] || endDate.errors?.['required']">租借期間必須填寫</div>
        <div *ngIf="rentDate.errors?.['CheckEndDate']">
          {{ rentDate.errors?.['CheckEndDate'].requiredValue }}
        </div>
      </div>
    </div>
第八章 Service (DI: 依存注入) 與 HttpClient
Service 的用途
- Angular 核心元件
- 專門處理某件事
- Component 負責處理畫面、資料綁定
- Service 負責取得資料、邏輯處理
- 模組化、增加重用性
- Component 使用 Dependency Injection (依存注入) Service
- 通常 Component 會共用一個 Service
- Service 的裝飾詞
- @Injectable
產生 Service
Service 註冊在…
-
@injectable 等級
- 在 service
- ‘root’ 範圍在整個應用成立
-
@ngModule 等級
- 在 app.module
- 範圍在目前這個 Module
-
@component 等級
- 在 .component.ts
- 範圍在目前這個 Component
(實作) 建立 與 使用 Service
- 新增三個 Component
- 使用 ng generate 建立一個service類別
- 實作 Service
//service1.ts
import { Injectable } from '@angular/core';
@Injectable({
  providedIn: 'root'
})
export class Service1Service {
public a: string;
constructor() {
this.a = "";
}
}
- 在 page1 使用 Service1
- 建構函式的參數傳入 service 的實體
//page1.component.ts

@Component({
  selector: 'app-page1',
  template: `
    <p>
      page1 works!
    </p>
    <h1> {{ s1.a }} </h1>
    <button (click)="Display()">Display()</button>
  `,
  styles: [
  ],
  providers: [Service1Service]
})
export class Page1Component {
  constructor(public s1: Service1Service) {
    s1.a = "data1";
  }

  ngOnInit(): void { }

  Display() {
    console.log("form page1: " + this.s1.a);
  }
}
- 在 Page2 使用 Service1
- 建構函式的參數傳入 service 的實體
@Component({
  selector: 'app-page2',
  template: `
    <p>
      page1 works!
    </p>
    <h1> {{ s1.a }} </h1>
    <button (click)="Display()">Display()</button>
  `,
  styles: [
  ],
  providers: [Service1Service]
})
export class Page2Component {
  constructor(public s1: Service1Service) {
    s1.a = "data2";
  }

  ngOnInit(): void { }

  Display() {
    console.log("form page2: " + this.s1.a);
  }
}
- 執行 Run
- 改成 Component Provider
- Page1 & Page2 @Component 設定 Provider
(實作) 使用 HttpClient 連接 WebAPI
HTTPClient
- 以 HTTP 協定與後端服務進行通訊
- 要先匯入 @angular/common/http 中的 HttpClientModule
- 以服務注入 (DI) 的方式帶入HTTPClient
- get()、post()、put()、delete()
使用HttpClient
- appModule 匯入 HttpClientModule
import { HttpClientModule } from '@angular/common/http';

@NgModule({
    ...略...
  imports: [
    BrowserModule,
    AppRoutingModule,
    HttpClientModule,
  ],
  ...略...
})
- 在要使用的類別之建構函式引入 HttpClient
HttpClient 的方法
get(url: string, options)
post(url: string, body: any, options)
put(url: string, body: any, options)
delete(url: string, options)
- url:目的端網址
- options:最常用 observe 與 responseType
- body:要放在 HTTP Body 的資料
- 回傳 Observable 或是 Observable
options
- HTTP 選項
-
observe 指定要傳回的內容
- body | events | response
-
responseType 指定傳回的資料格式
- arraybuffer | blob | json | text
-
headers 指定 HTTP 的標頭資訊
Observable
- 可觀察物件傳遞 HttpClient 的回傳值
- 通常用於事件處理及非同步設計…
- 使用 subscribe() 方法並傳入一個 observer (觀察者物件)
- observer 物件定義回呼函式
- next: 必要,當處理的值送達時執行,可執行 0-n 次
- error: 可省略,處理錯誤的程序
-
complete: 可省略,處理執行完畢時的通知
- 預備檔案:
Ended: Angular筆記
CSS框架 ↵
使用 Bootstrap 快速建立響應式網站
使用全球最流行的前端開發工具 Bootstrap,快速設計及自定義響應式網站,其擁有豐富的 Sass 變數與 mixins、響應式網格系統、大量預設元件以及強大的 JavaScript 插件。
快速開始
如何安裝
通過 npm、Composer 或 Meteor 安裝 Bootstrap 的 Sass 和 JavaScript 原始碼。
jsDelivr
如果你只是需要使用 Boostrap 的 CSS 或是 JS,那麼你可以考慮使用jsDelivr。
CSS
將樣式表 <link> 複製-貼上到 <head> 中其他所有的樣式表之前,以便載入 Bootstrap 的 CSS。
<!-- CSS only -->
<link href="https://cdn.jsdelivr.net/npm/bootstrap@5.1.1/dist/css/bootstrap.min.css" rel="stylesheet" integrity="sha384-F3w7mX95PdgyTmZZMECAngseQB83DfGTowi0iMjiWaeVhAn4FJkqJByhZMI3AhiU" crossorigin="anonymous">
JS
許多元件需使用 JavaScript 才可以運行。將以下 <script> 之一放在頁面末尾, </body> 結尾標籤之前以啟用它們。
<!-- JavaScript Bundle with Popper -->
<script src="https://cdn.jsdelivr.net/npm/bootstrap@5.1.1/dist/js/bootstrap.bundle.min.js" integrity="sha384-/bQdsTh/da6pkI1MST/rWKFNjaCP5gBSY4sEBT38Q/9RBh9AH40zEOg7Hlq2THRZ" crossorigin="anonymous"></script>
元件 (Components)
顯示需要 Javascript 的元件
- 可以關閉的警告
- 用於切換狀態和 checkbox / radio 功能的按鈕 (Buttons)
- 用於所有頁面滑動行為、控制以及指示器的幻燈片 (Carousel)
- 用於切換內容可見性的折疊選單 (Collapse)
- 用於顯示與定位的下拉選單 (Dropdown) (同時需要 Popper)
- 用於顯示、定位與滑動行為的互動視窗 (Modals)
- 用於拓展折疊選單 (Collapse) 插件以實現響應行為的導覽列 (Navbar)
- 用於顯示、定位和滾動行為的畫布 (Offcanvas)
- 用於顯示與關閉的吐司 (Toasts)
- 用於顯示與定位的工具提示 (Tooltips) 和彈跳視窗 (popovers) (同時需要 Popper)
- 用於滾定行為以及導覽更新的滑動監控 (Scrollspy)
排版
斷點 (Breakpoints)
斷點是 Bootstrap 中的觸發器,用於控制排版如何在不同的設備或視區大小進行響應式的變化。
核心觀念
-
斷點是響應式開發的基礎。 使用斷點來控制在特定尺寸或設備上調整佈局。
-
使用 media queries 的斷點構建 CSS。 media queries 是 CSS 的一個特性,它允許您根據瀏覽器和操作系統参數有條件地套用樣式。我們最常在 media queries 中使用 min-width.
-
在響應式開發中,主要會以行動版為優先。 Bootstrap 的 CSS 旨在使用最少的樣式來使佈局在最小的斷點處工作,然後在樣式上分層以針對較大的設備調整該設計。這樣可以優化CSS,縮短渲染時間,並為訪問者提供出色的體驗。
網格選項
| Breakpoint | Class infix | Dimensions |
|---|---|---|
| X-Small | None | < 576px |
| Small | sm |
≥ 576px |
| Medium | md |
≥ 768px |
| Large | lg |
≥ 992px |
| Extra large | xl |
≥ 1200px |
| Extra extra large | xxl |
≥ 1400px |
容器 (Containers)
容器是 Bootstrap 的基本建構區塊,在給定的設備或是視區中包含、填充和對齊你的內容
如何使用
容器是 Bootstrap 中最基本的佈局元素,在使用我們的網格系統時是必需的。容器用於在容納,填充和(有時)使內容居中。儘管容器 可以 巢狀,但大部分排版不需要巢狀。
Bootstrap 本身自帶三種不同的容器
.container, 每一個響應式斷點都會設置一個max-width.container-fluid, 所有斷點都是width: 100%.container-{breakpoint}, 直到指定斷點之前,都會是width: 100%
下表說明了每個容器的 max-width 與每個斷點處的原始 .container 和 .container-fluid 的比較。
可以在實際操作中觀看它們,並在我們的網格範例中進行比較。
| Extra small <576px | Small ≥576px | Medium ≥768px | Large ≥992px | X-Large ≥1200px | XX-Large ≥1400px | |
|---|---|---|---|---|---|---|
| .container | 100% | 540px | 720px | 960px | 1140px | 1320px |
| .container-sm | 100% | 540px | 720px | 960px | 1140px | 1320px |
| .container-md | 100% | 100% | 720px | 960px | 1140px | 1320px |
| .container-lg | 100% | 100% | 100% | 960px | 1140px | 1320px |
| .container-xl | 100% | 100% | 100% | 100% | 1140px | 1320px |
| .container-xxl | 100% | 100% | 100% | 100% | 100% | 1320px |
| .container-fluid | 100% | 100% | 100% | 100% | 100% | 100% |
預設容器
響應式容器
<div class="container-sm">100% wide until small breakpoint</div>
<div class="container-md">100% wide until medium breakpoint</div>
<div class="container-lg">100% wide until large breakpoint</div>
<div class="container-xl">100% wide until extra large breakpoint</div>
<div class="container-xxl">100% wide until extra extra large breakpoint</div>
網格系統 (Grid system)
Material UI
安裝 Angular Material
顯示一個元件
我們在應用中顯示一個滑塊開關元件,來驗證一切正常。
你需要透過把以下程式碼新增到 app.module.ts 檔案中來匯入 MatSlideToggleModule
import { MatSlideToggleModule } from '@angular/material/slide-toggle';

@NgModule ({
  imports: [
    MatSlideToggleModule,
  ]
})
class AppModule {}
把 <mat-slide-toggle> 標籤新增到 app.component.html,就像這樣:
執行本地開發伺服器:
元件 Components
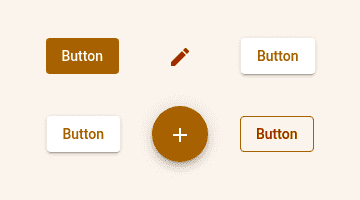
Angular Material 包含一大組基於 Material Design 規範的 UI 元件。
-
帶有一系列候選項的互動式按鈕。
-
捕獲日期,和其內部表示形式無關。
-
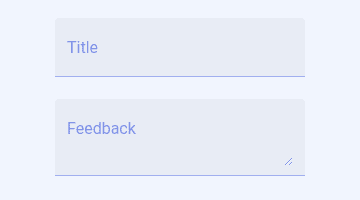
包裝表單欄位,來讓它們的顯示保持一致。
-
讓原生輸入框可用於表單欄位中。
-
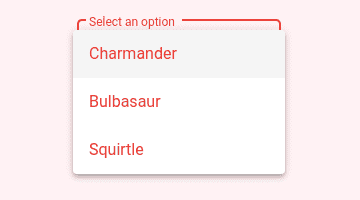
允許使用者從下拉框中選擇一個或多個選項。
-
一個固定在螢幕一側的內容容器。
-
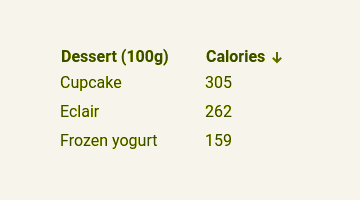
讓使用者可以指定表格型資料該如何排序。
-
以分步進展的方式呈現內容。
-
在指定的一組檢視中,只同時呈現一個檢視
Tailwind CSS
Tailwind CSS 的工作原理是掃描所有HTML 檔案、JavaScript 元件以及任何範本中的CSS 類別(class)名,然後產生對應的樣式程式碼並寫入到一個靜態CSS 檔案中。
他快速、靈活、可靠,沒有運行時負擔。
安裝
使用 Angular 安裝 Tailwind CSS
在 Angular 專案中設定 Tailwind CSS。

- 如果您還沒有設定一個新的 Angular 項目,請先建立一個新的 Angular 項目。最常見的方法是使用Angular CLI。

- 透過npm安裝
tailwindcss,然後執行init命令產生檔。tailwind.config.js

- 在文件中新增所有範本文件的路徑
tailwind.config.js。
/** @type {import('tailwindcss').Config} */
module.exports = {
  content: [
    "./src/**/*.{html,ts}",
  ],
  theme: {
    extend: {},
  },
  plugins: [],
}

@tailwind將Tailwind 每個層的指令加入您的檔案中。./src/styles.css

- 使用
ng serve運行您的建置過程。

- 開始使用 Tailwind 的實用程式類別來設計您的內容。
安裝編輯器插件
一般HTML/CSS 與使用Tailwind CSS 的差異
<style>
  .container {
    width: 100%;
    max-width: 960px;
    margin: 0 auto;
    padding: 0 20px;
  }
  .button {
    display: inline-block;
    padding: 10px 20px;
    background-color: #4CAF50;
    color: white;
    text-align: center;
    text-decoration: none;
    font-size: 16px;
    cursor: pointer;
    border-radius: 5px;
  }
  .button:hover {
    background-color: #45a049;
  }
</style>

<div class="container">
  <h1>Hello, World!</h1>
  <a href="#" class="button">Click Me</a>
</div>
  <div class="container mx-auto px-4">
    <h1 class="text-3xl font-bold mt-8">Hello, World!</h1>
    <!-- 使用 Tailwind CSS  -->
    <a href="#" class="bg-green-500 hover:bg-green-600 text-white font-bold py-2 px-4 rounded inline-block mt-4">Click Me</a>
  </div>
Tailwind CSS 提供了一種更直觀和快速的方式來定義和應用樣式,減少了手動編寫 CSS 的工作量,提高了開發效率。


